
So you’re ready to remodel your bathroom. The key to a successful project—one that doesn't spiral into a chaotic, budget-busting mess—is breaking it down into manageable chunks. It's all about having a clear vision, a realistic budget, and the right people on your team before a single tile is pulled up.
Your Bathroom Remodel Planning Blueprint
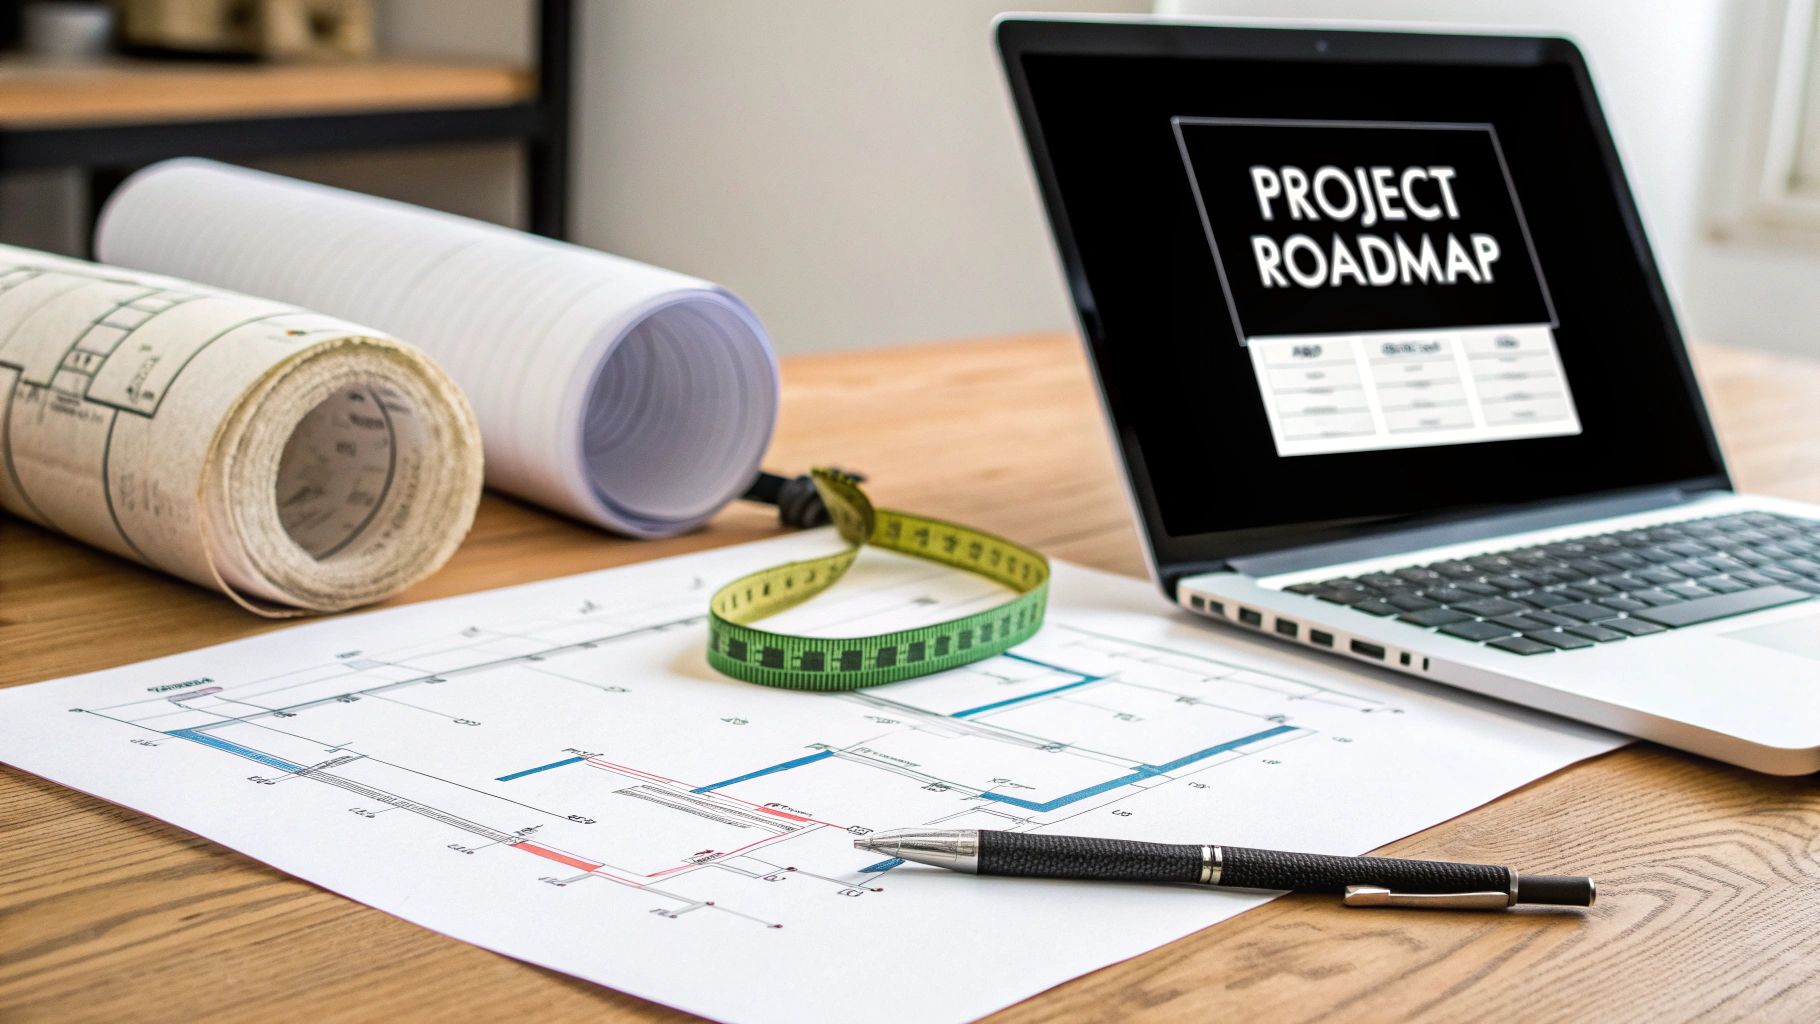
Jumping into a renovation without a solid plan is like trying to build a house without a foundation. You might end up with something that looks okay, but it's bound to be a stressful, inefficient, and expensive process. A detailed plan is your single most valuable tool. It turns a massive undertaking into a series of clear, actionable steps, helping you prevent problems instead of just reacting to them.
This first phase isn't about picking out paint swatches just yet. Right now, you need to think like a project manager. The goal is to lay a strong groundwork that will inform every single decision down the line. That means getting brutally honest about your motivations, your budget, and the absolute must-haves for your new space.
The Why Before the What
Before you fall in love with a specific vanity or showerhead, stop and ask yourself why you're remodeling in the first place. Your answer will define the entire scope of the project.
- Improving Accessibility: Are you planning to stay in your home long-term? If so, you'll probably want to prioritize things like a curbless shower, strategically placed grab bars, or a wider doorway.
- Creating a Personal Oasis: Maybe your main goal is a spa-like retreat to escape the daily grind. In that case, features like a deep soaking tub, heated floors, and dimmable, ambient lighting should be at the top of your list.
- Boosting Home Value: Getting ready to sell? The smart play is to focus on classic, widely appealing choices—think neutral color palettes and modern, water-efficient fixtures that will impress potential buyers.
Knowing your primary motivation is crucial for separating the "must-haves" from the "nice-to-haves." This clarity is your best defense against budget overruns. Interestingly, this focus on personal lifestyle needs is a major trend. The global bathroom remodeling market, valued at a whopping $398.1 billion, is expected to hit $574.1 billion by 2034, largely because homeowners are customizing their spaces for their own use, not just for resale. You can read more about this market shift to get a better sense of current trends.
Core Planning Stages
Breaking down your project into distinct stages makes the whole process feel less overwhelming. Each phase logically builds on the one before it, ensuring you end up with a cohesive and successful renovation.
To help you get organized, here’s a high-level look at the essential planning stages you’ll go through.
Core Bathroom Remodel Planning Phases
| Planning Phase | Primary Goal | Key Decisions |
|---|---|---|
| 1. Vision & Goals | Define why you are remodeling and what you want to achieve. | Layout changes, must-have features, style preferences. |
| 2. Budgeting | Set a realistic financial limit for the entire project. | Total spend, labor vs. materials split, contingency fund. |
| 3. Design | Create a detailed plan and layout for the new space. | Floor plan, fixture placement, lighting scheme. |
| 4. Hiring | Find and vet qualified professionals for the job. | Contractor vs. DIY, selecting designers or architects. |
| 5. Material Selection | Choose all fixtures, finishes, and materials. | Tile, vanity, countertops, faucets, paint, flooring. |
Think of these phases as your strategic roadmap. They guide you from the big, broad ideas all the way down to the nitty-gritty details.
A great bathroom remodel is 10% inspiration and 90% perspiration during the planning phase. The detailed work you do now, before any demolition begins, saves you from costly on-the-fly decisions and unexpected setbacks later.
Every choice you make, no matter how small—from the overall layout to the finish on the cabinet pulls—should tie directly back to your original vision and budget. This disciplined approach is what ensures your finished bathroom doesn't just look incredible, but functions perfectly for you and your family for years to come.
What's the Big Idea? Nailing Down Your Vision and Scope
Every great remodel I’ve ever seen started with a solid plan, long before anyone picked up a sledgehammer or looked at tile. This is the crucial first step: turning those dreamy images you've saved on Pinterest into a real, workable blueprint for your bathroom. It's about getting crystal clear on what you want your new space to be—not just what it looks like, but how it needs to work for you every single day.
Let's be honest, bathrooms aren't just utilitarian boxes anymore. They’ve become personal retreats, little sanctuaries for getting away from it all. That shift means your vision has to be both deeply personal and incredibly practical.
Are We Talking a Facelift or Major Surgery?
Your first big decision is figuring out just how deep you want to go. This choice sets the stage for everything that follows, from your budget to your timeline. Knowing the difference between a refresh and a full gut job is key to keeping your expectations in check.
-
The Cosmetic Refresh: This is all about surface-level changes. Think a fresh coat of paint, swapping out that old vanity, upgrading faucets, and maybe putting in some new light fixtures. Your layout and plumbing stay exactly where they are. It’s the perfect route for a high-impact update without breaking the bank.
-
The Full Gut Renovation: Now we're talking about a complete do-over. Walls might be coming down, plumbing and electrical get re-routed, and everything from the subfloor to the ceiling gets replaced. You'll go this route when you want to completely rethink the layout and function of the room.
For example, a family I worked with had a dated but perfectly functional guest bath. They opted for a cosmetic refresh—new vanity, mirror, lights, and paint—and completely modernized its look for under $5,000. On the other hand, a couple planning their "forever home" decided on a full gut renovation of their master bath. We moved the toilet and replaced a clunky old tub with a gorgeous, curbless walk-in shower to make it safer as they age. That project, being far more involved, ran them over $25,000.
Turning Your Daydreams into a Real Plan
Finding inspiration is the easy part. The real work is translating that inspiration into a design that actually fits your space and solves your problems. The best place to start? By listing everything you can't stand about your current bathroom.
Is that single sink the cause of a traffic jam every morning? Is the total lack of storage driving you crazy? Does the terrible lighting make getting ready feel like a guessing game?
Your answers are the building blocks of your priority list. This is where you have to be brutally honest and separate your absolute "must-haves" from your "nice-to-haves."
A beautiful bathroom that doesn't fix your daily frustrations is a failed project. The goal is to solve problems, not just create a pretty picture.
Imagine a classic scenario: a cramped, dark master bathroom. The "must-haves" would probably be a double vanity for elbow room, much better task lighting over the mirrors, and a fan that actually works. The "nice-to-haves" might be a freestanding tub, heated floors, or one of those cool smart mirrors.
When you categorize your wish list like this, you create a clear roadmap. If the budget starts to feel tight later on, you'll know exactly what you can cut without sacrificing the essential functions that made you want to remodel in the first place.
Make Sure Your Vision Fits Your Home and Your Life
Your new bathroom shouldn't feel like it was dropped in from another planet. The style needs to flow with the rest of your home's character. A super-sleek, minimalist bathroom can feel jarring in a cozy, historic craftsman, just like a rustic farmhouse design might look out of place in a modern downtown condo.
This is also the moment to think about how you actually live. I'm seeing a huge shift where people are designing for their own comfort and long-term needs rather than just thinking about resale value. For instance, designing for accessibility as we age is a massive driver. In fact, 1 in 8 homeowners are now opting for "wet rooms," showing a clear desire for more open, advanced layouts. We're also seeing trends like fluted wood cabinets and clever in-drawer outlets, which point to a need for more texture, less clutter, and real-world convenience. You can discover more about these market trends and see how homeowner priorities are evolving.
Ultimately, this first phase is all about asking the right questions. What do you need this bathroom to do for you and your family five, ten, or even fifteen years from now? Your answers will become the solid foundation for your entire project.
Creating a Realistic Remodel Budget
Let’s get right to it—the money talk. It’s the one thing that keeps homeowners up at night when they start dreaming about a new bathroom. But setting a realistic budget isn't about crushing those dreams; it's about giving them a solid foundation to become reality. Think of your budget as the roadmap that guides every single decision, from the tile you fall in love with to the contractor you trust with your home.
Without a clear financial plan, it's all too easy for costs to creep up, and then suddenly, they're sprinting out of control. An exciting project can quickly turn into a source of major stress. The trick is to be brutally honest with yourself about what you can invest and then break that number down into logical pieces.
Breaking Down Where The Money Goes
Most people are surprised to learn where their money actually goes during a renovation. Knowing the typical cost breakdown from the get-go helps manage expectations and prevents that dreaded sticker shock later on. While every single project has its own unique quirks, most mid-range remodels follow a pretty predictable spending pattern.
This table gives you a clear look at a typical cost breakdown for a mid-range bathroom remodel, helping you see where your investment will likely go.
Sample Bathroom Remodel Budget Allocation
| Expense Category | Percentage of Budget | Example Cost (on a $20,000 Project) |
|---|---|---|
| Labor | 40% - 50% | $8,000 - $10,000 |
| Fixtures (tub, toilet, sink) | 15% - 20% | $3,000 - $4,000 |
| Cabinetry & Vanity | 10% - 15% | $2,000 - $3,000 |
| Tile & Flooring | 10% - 15% | $2,000 - $3,000 |
| Countertops | 5% - 7% | $1,000 - $1,400 |
| Lighting & Ventilation | 5% | $1,000 |
| Permits & Other Fees | 1% - 3% | $200 - $600 |
This gives you a solid starting point for allocating your funds. It's a quick reference to keep your spending priorities in check as you move through the planning process.
Did you notice that labor often eats up nearly half the entire budget? That’s huge. It’s also why a seemingly simple decision, like moving the toilet six inches to the left, can have such a massive impact on your final bill. You’re not just paying for a new toilet; you're paying for the hours of skilled plumbing and construction work required to make that move happen. For a more granular look, you can explore our full bathroom remodel cost breakdown.
Matching Your Budget to Your Project Scope
The scale of your ambition is, without a doubt, the biggest driver of your final cost. A simple cosmetic refresh—think new paint, fixtures, and hardware—is going to be worlds away from a full-gut renovation where walls are coming down.
This visual breakdown is a great way to see how different project scopes line up with typical budget ranges.
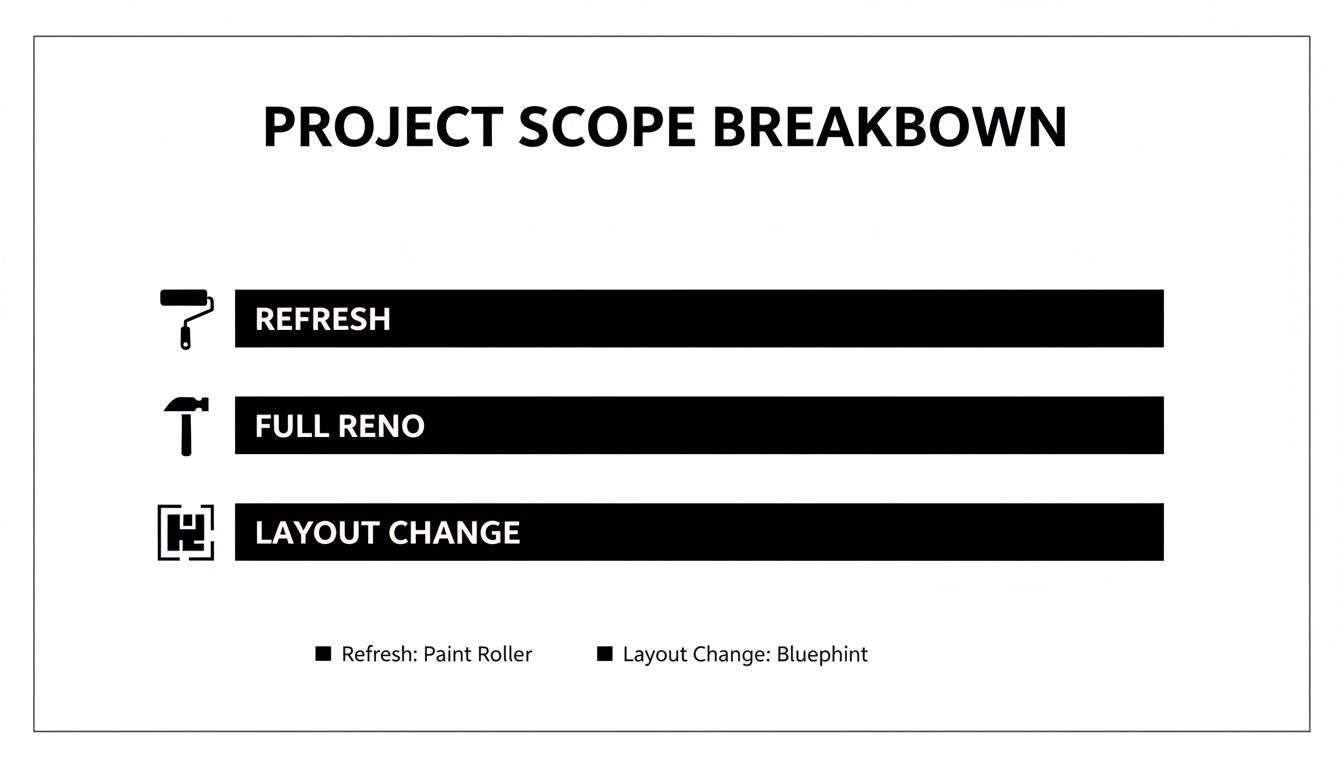
As you can see, the leap from a simple refresh to a full layout change is significant, both in complexity and cost. Understanding these categories right from the start helps you set financial goals that are actually achievable.
To put some real numbers on it, recent industry data shows that minor remodels in smaller bathrooms (under 100 sq ft) have a median spend around $6,000, while major renovations in larger bathrooms can easily top $11,500. Your specific choices matter, too. For instance, a custom-built vanity can run up to $2,800 per linear foot, plus another $200-$1,000 for installation. Decide you want that vanity on a different wall? Relocating the plumbing will tack on another $1,000 or more to the project.
The Hidden Costs You Absolutely Need to Plan For
It’s usually not the beautiful tile or the fancy faucet that blows a budget. It's the stuff you didn't see coming. These "hidden" costs are a normal part of any renovation, but they can create chaos if you aren't prepared for them.
From my experience, you should always build these potential costs into your plan:
- Demolition and Debris Removal: Getting rid of the old stuff isn't free. You'll need to budget for a dumpster rental or a junk removal service to haul away old tile, drywall, and fixtures.
- Unexpected Repairs: This is the big one. Once you open up the walls, you might find anything from old water damage and mold to scary-looking wiring that needs to be brought up to code. These issues must be fixed.
- Permit Fees: If your project involves moving plumbing or electrical lines, your town will almost certainly require a permit, and that comes with a fee.
- Temporary Accommodations: If this is your only full bathroom, what's the plan while it’s out of commission for a few weeks? Don't forget to account for this.
The single most important line item in your entire budget is your contingency fund. My golden rule is to set aside an extra 15-20% of your total project cost. This isn't "if you need it" money; it's "when you need it" money.
This fund is not optional. It’s the financial cushion that lets you handle a surprise problem without having to sacrifice the finishes you've been dreaming about. Having that buffer is the key to a lower-stress renovation and ensures your project doesn’t get derailed when something unexpected, and inevitable, happens.
Selecting Materials, Finishes, and Fixtures
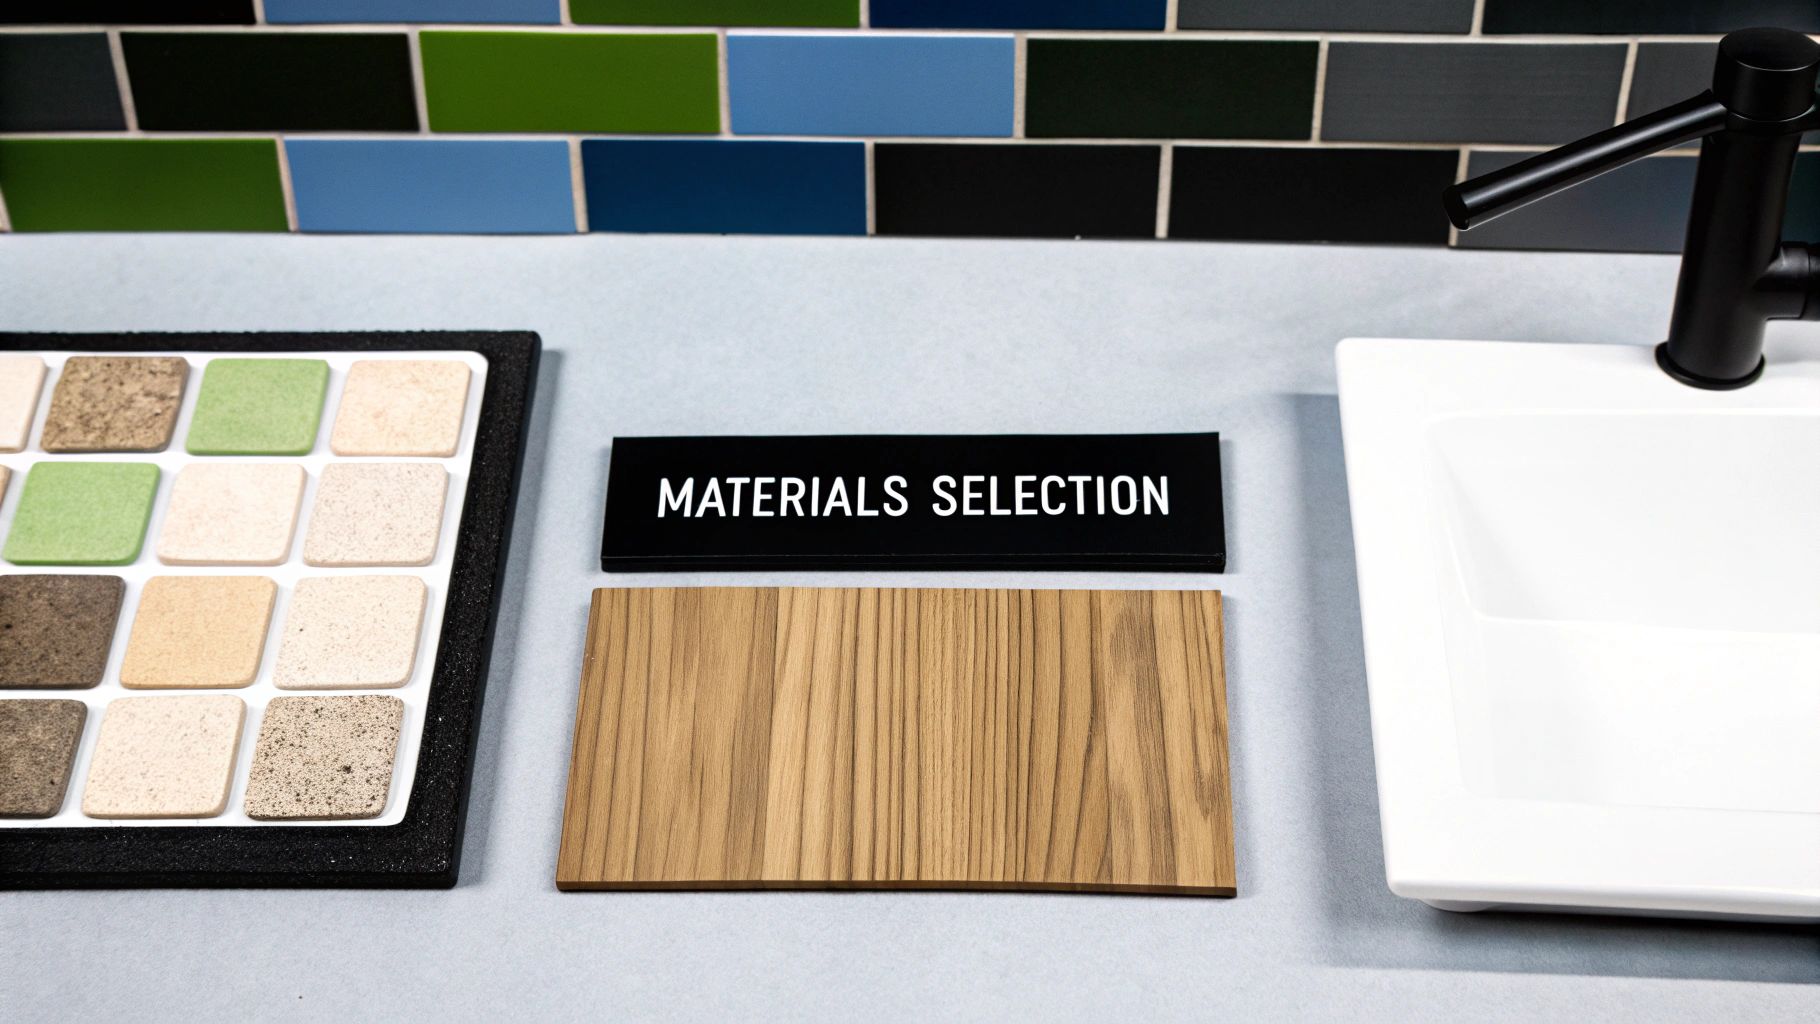
This is where the fun really begins—and where your bathroom’s personality truly comes to life. But choosing materials, finishes, and fixtures is about so much more than just looks. It’s about picking components that can handle the daily reality of a bathroom: moisture, heat, and constant use.
Think of it like you're putting together a design palette. Every single element, from the floor tile to the faucet, should feel like it belongs. Before you click "order" on anything, I can't stress this enough: gather physical samples. Get a piece of your floor tile, a swatch of the vanity finish, a chip of the countertop, and the paint color. Lay them all out together inside the bathroom to see how they look in that specific light. This one simple step has saved countless clients from expensive mismatches.
Durability First: Tile and Flooring
The surfaces in your bathroom take a real beating, so durability is non-negotiable. For your floors and shower walls, you need materials that are waterproof, a breeze to clean, and slip-resistant.
- Porcelain Tile: This is the undisputed workhorse of bathroom materials. It’s incredibly dense, which makes it highly resistant to water and stains. Plus, it comes in a staggering array of styles that can mimic everything from natural stone to warm wood.
- Ceramic Tile: A more budget-friendly option, ceramic is a fantastic choice, especially for walls. It is a bit more porous than porcelain, so just make sure it’s properly glazed if you're using it in a shower or other wet area.
- Natural Stone: There's no denying the one-of-a-kind beauty of materials like marble, travertine, or slate. Just be aware that they come with homework. They're porous and require regular sealing to prevent stains and water damage. They also tend to be pricier and can be slippery when wet.
A common regret I hear from homeowners is choosing tiny, intricate tiles for a shower floor. They look gorgeous at first, but all those grout lines quickly become a maintenance nightmare. Going with larger format tiles means less grout to scrub—a huge win for your future self.
Pro Tip: When planning a bathroom remodel, always buy your tile at the same time and order 10-15% extra. This overage covers cuts, breakage, and potential future repairs. It also ensures all your tiles come from the same color batch, preventing weird, noticeable variations.
Vanities, Countertops, and Fixtures
Your vanity often becomes the bathroom's main focal point, while the fixtures are like the functional jewelry of the space. These choices should not only complement your tile and overall style but also be tough enough for daily life.
When picking a vanity, balance style with your actual storage needs. A floating vanity can make a small bathroom feel much more open, while a traditional cabinet offers the most storage. For countertops, quartz is a top contender in my book. It’s a non-porous, engineered material that resists stains and bacteria without ever needing to be sealed. That makes it a low-maintenance champion compared to porous options like granite or marble.
Fixtures—the faucet, showerhead, and hardware—are where you can inject a ton of character.
- Finishes: Polished chrome is a timeless classic. Brushed nickel offers a softer look and is great at hiding water spots. Matte black makes a bold, modern statement.
- Functionality: Little details make a big difference. Think about a shower system with a handheld sprayer (a game-changer for cleaning) or a faucet with a higher arc to accommodate a vessel sink.
The Unsung Heroes: Ventilation and Paint
Two of the most critical elements in any bathroom remodel are also the least glamorous: the exhaust fan and the paint. A high-quality, properly sized ventilation fan is your number one defense against mold and mildew. Look for one with a low sone rating (that’s the noise level) and a CFM (cubic feet per minute) rating that’s right for your bathroom’s square footage.
Likewise, choosing the right paint is non-negotiable. You need a formula specifically designed for high-moisture environments. These paints contain antimicrobial agents to stop mold growth and have a durable finish that you can easily wipe down. Investing in the right paint finish for your bathroom is a small upfront cost that protects your entire investment from moisture damage down the road.
Hiring the Right Contractor for the Job
Let's be honest: choosing the right contractor is probably the biggest decision you'll make in this entire process. It’s the one that can make or break your whole bathroom remodel. A great pro is a partner who brings your vision to life, while a bad one can turn your dream project into a nightmare of blown budgets and endless delays.
So, where do you find the good ones? Don't just type "contractor near me" into a search bar. Start by asking people you trust—friends, family, or neighbors who have had great experiences with their own renovations. Local building supply stores can also be a goldmine for recommendations.
Vetting Your Candidates
Once you’ve put together a shortlist of three to five potential contractors, it's time to dig in. The interview is your chance to see past the sales pitch and get a feel for their experience, communication style, and professionalism. Being licensed and insured is the bare minimum; you need to go deeper.
This isn't just about getting a quote. It's about finding someone you can trust in your home for weeks on end. You need a list of smart, open-ended questions ready to go.
- See Their Work: Ask for a portfolio of bathroom remodels similar to what you have in mind. Look closely at the details—is the tile work clean? Do the cabinet doors line up perfectly? The finish work tells you everything.
- Talk About Communication: How will you stay in the loop? Will there be a dedicated project manager or will you be speaking directly with the lead contractor? Good, consistent communication is the secret to a stress-free project.
- Ask About Their Crew: Do they have a regular team of plumbers, electricians, and other specialists? A contractor who works with the same trusted crew project after project is a good sign of quality control and stability.
For a more exhaustive list, we've put together a guide on the crucial questions to ask a general contractor before you even think about signing a contract.
Always, always check references. And don’t just take a list of their five favorite clients. Ask to speak with the last two homeowners they worked with. This will give you the most honest, up-to-date picture of their work.
Analyzing the Bids
After the interviews, you'll start getting bids. The natural instinct is to scan right to the final price, but that’s a classic mistake. The cheapest bid is almost never the best value. You need to sit down and compare them line-by-line to see what you're actually getting for your money.
Pay close attention to these three areas:
- Material Allowances: What dollar amount did they budget for things like your vanity, faucets, and tile? A suspiciously low bid often hides unrealistic allowances, which means you’ll be paying for major upgrades out-of-pocket later.
- Scope of Work: Make sure every bid is quoting the exact same job. One contractor might include demolition and hauling away the debris, while another lists that as a separate line item. These differences add up fast.
- Payment Schedule: A professional contractor will outline a clear payment plan tied to project milestones—like when demolition is done or after rough-in inspections are passed. Be very cautious of anyone asking for a massive deposit upfront (more than 10-15% is a red flag).
Finally, read the contract. Every single word. It should spell out the complete scope of work, the payment schedule, a projected timeline, and how any changes or surprises will be handled. This document is your ultimate protection, ensuring your bathroom remodel stays on track and on budget.
Navigating the Construction Process
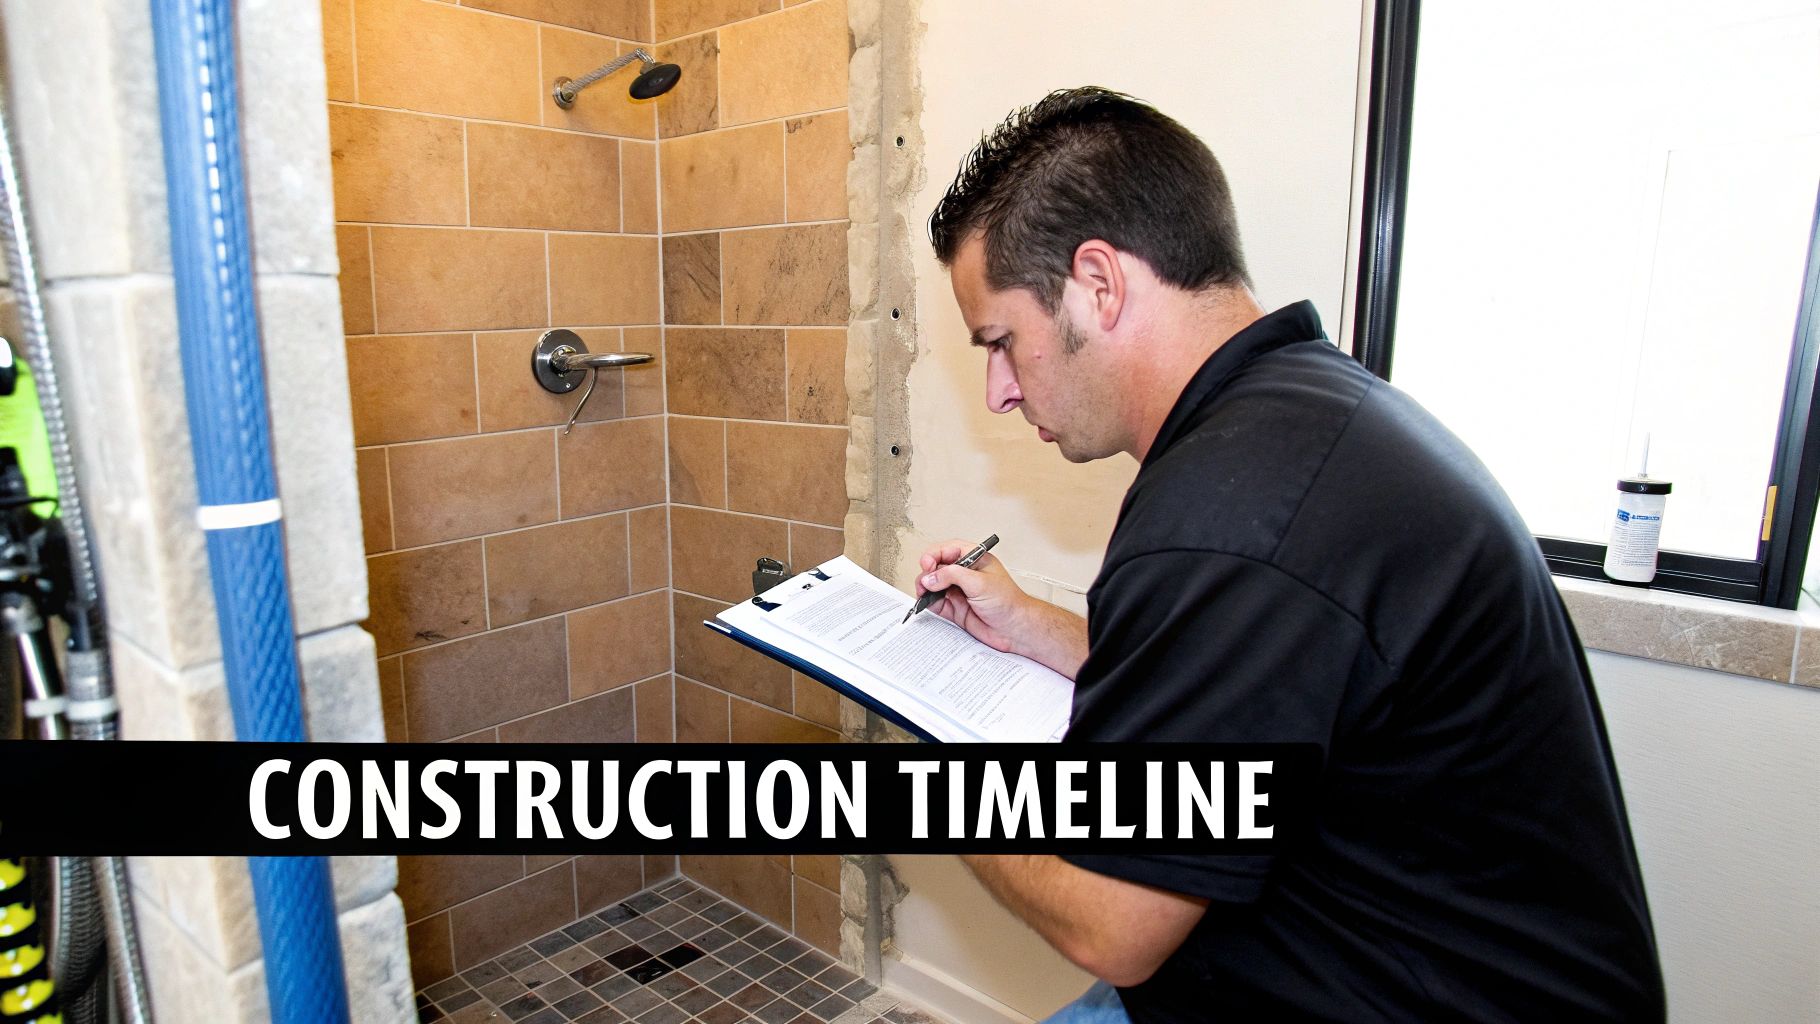
Okay, this is where the magic happens. Your plans are locked in, your team is ready to go, and the real transformation is about to kick off. Be prepared: the construction phase can often feel like a bit of organized chaos, but knowing the sequence of events helps you keep your sanity and manage expectations.
It all starts with demolition. This is, without a doubt, the loudest and dustiest part of the entire project. Your crew will come in and carefully tear out everything—old fixtures, tile, drywall, maybe even the subfloor. A good contractor will take steps to contain the mess by sealing off the work area with plastic sheeting and setting up fans to vent dust outside.
If this is your only full bath, now's the time to have that temporary bathroom station sorted out!
The Rough-In Stage
With the room stripped down to the studs, the "rough-in" work begins. This is the stuff you won't see in the finished product, but it's the absolute backbone of your new bathroom. Plumbers will run new supply lines and drains, and electricians will pull all the new wiring for lights, outlets, and fans through the open walls.
This is also a critical checkpoint. Before any drywall goes up, your local building inspector will need to come out and sign off on all the new plumbing and electrical work. This isn't just a formality; it ensures everything is up to code and, more importantly, safe.
Once the inspector gives the green light, insulation is installed, and the new drywall is hung, taped, and mudded.
From Structure to Style
This is the fun part. The room starts to look less like a construction zone and more like an actual bathroom. The work generally happens in a top-down order to avoid damaging newly installed elements.
- Tiling: First up is the tile. Your tile setter will meticulously lay out the floor and wall tile. This is a true craft, especially if you have an intricate pattern or delicate mosaics.
- Painting: After the tile is set and the grout has cured, the painters can finally get to work on the ceiling and any non-tiled walls.
- Cabinetry and Countertops: Next, the vanity and any storage cabinets are installed, which are then topped off with your new countertop.
- Fixture Installation: The finish line is in sight! The plumber and electrician return to do their "finish" work—setting the toilet, installing the faucets and showerhead, and connecting all the light fixtures, switches, and outlets.
Your best tool during this phase is constant communication with your contractor. Even a quick daily check-in or a scheduled weekly walkthrough can catch small issues before they snowball into bigger problems.
The very last step is the walkthrough and punch list. You’ll walk through the completed bathroom with your contractor and create a "punch list" of any final tweaks. This could be anything from a paint scuff to a slightly loose cabinet handle.
A true professional will take this list seriously and address every item. And a final piece of advice: never make that final payment until you are 100% satisfied with every last detail. This is your investment, and this final check ensures it's perfect.
Common Bathroom Remodel Questions Answered
Even the most meticulously planned remodel comes with its fair share of questions. It's only natural. Let's tackle some of the big ones we hear all the time from homeowners diving into their first bathroom renovation.
How Long Does a Bathroom Remodel Actually Take?
This is the million-dollar question, and the honest answer is: it completely depends on the scope of your project.
A simple cosmetic refresh—think a fresh coat of paint, a new vanity, and updated light fixtures—can often be wrapped up in just 1-2 weeks. It’s a quick-win project with a big impact.
However, a more standard remodel, the kind that involves ripping out old tile and maybe some minor plumbing tweaks, usually lands in the 3-5 week range from the first swing of the sledgehammer to the final polish.
Now, if you're planning a full gut renovation that involves moving walls, relocating the toilet, or reconfiguring the shower, you need to be more patient. Realistically, you should expect the project to take 6-8 weeks, sometimes longer. Delays can easily happen, especially if you're waiting on custom-ordered tile or cabinetry, so it's smart to build a buffer into whatever timeline your contractor gives you.
Will I Need a Permit for My Remodel?
If you're doing anything more involved than painting or swapping out a faucet, the answer is almost certainly yes. Building permits are your friend—they ensure the work is safe, up to code, and won't cause problems down the road.
Permits are typically required for any work that touches your home's core systems. This includes common updates like:
- Moving a toilet or drain
- Converting a bathtub into a shower
- Adding new lighting circuits or outlets
Your general contractor should be the one to handle pulling all the necessary permits. Whatever you do, don't be tempted to skip this step to save a few bucks. It can lead to major headaches, failed inspections, and serious issues when it's time to sell your home.
The best way to save money without cutting corners is to keep your existing plumbing layout. Moving drains and supply lines is a major labor expense that can quickly inflate a budget.
You can also find significant savings by choosing smart, high-quality materials. Classic porcelain tile, for instance, gives a beautiful finish for a fraction of the cost of natural marble. Have a vintage cast-iron tub? Consider refinishing it instead of replacing it to preserve character and cash.
Finally, feel free to tackle some cosmetic tasks like painting yourself. But when it comes to plumbing, electrical, and especially waterproofing, always leave it to licensed professionals. A small mistake there can turn into a dangerously expensive disaster.
Ready to turn your vision into a reality? The team at Garner Construction & Maintenance provides expert craftsmanship and stress-free project management for renovations of any size. https://www.garnercandm.com