
Embarking on a home renovation can be one of the most rewarding projects you will ever undertake, but it is also filled with potential pitfalls that can derail even the best intentions. From unexpected budget blowouts and permit delays to timeline troubles with contractors, the difference between a dream result and a disaster often comes down to one critical element: meticulous preparation. A well-structured plan is not just helpful; it is essential for navigating the complexities of any remodel, whether you are a homeowner updating a kitchen, a property manager turning over a unit, or a seller preparing a home for the market.
This guide provides more than just a list; it is an actionable, phase-by-phase home renovation checklist designed for those who demand clarity, control, and a successful outcome. We will move beyond generic advice to give you specific templates, critical questions to ask potential contractors, and strategic insights for each stage of the process. You will learn how to establish a realistic budget, secure proper financing, and hire a trustworthy team. We will cover the essentials of planning, from design layouts and material selection to obtaining the correct permits and ensuring everything is up to code.
By following this comprehensive roadmap, you will be equipped to manage your project proactively, anticipate challenges, and make informed decisions every step of the way. This checklist is your tool for transforming a potentially stressful process into a structured, manageable, and ultimately successful project. The final result will be a space that not only meets but exceeds your vision, all while protecting your investment. Let's build a foundation for success, one checklist item at a time.
1. Establish a Clear Budget and Financing Plan
Before a single hammer swings, your most powerful tool is a well-defined budget. This foundational step in any home renovation checklist dictates every subsequent decision, from material selection to project scope. A comprehensive budget is more than just a total number; it’s a detailed financial roadmap that ensures your project reaches the finish line without unexpected financial strain. It forces you to align your vision with reality, prioritize your "must-haves" versus "nice-to-haves," and provides a clear framework for discussing costs with potential contractors.
Creating Your Financial Blueprint
Start by researching average costs for your specific project type using resources like the NKBA (National Kitchen & Bath Association) guidelines or online cost databases. Next, gather at least three itemized estimates from reputable contractors. This allows you to compare not just the final price but also the breakdown of labor and material costs.
A crucial component is the contingency fund, which should be 10-20% of your total estimated cost. This is not an optional buffer; it’s a necessary allocation for unforeseen issues like hidden water damage, outdated wiring, or structural problems that often emerge during demolition.
Practical Budgeting Tips
- Request Itemized Quotes: Insist that contractors like Garner Construction & Maintenance provide quotes that separate labor from materials. This transparency helps you see exactly where your money is going and identify areas for potential savings.
- Set a Percentage-Based Contingency: A 15% contingency on a $50,000 project ($7,500) is more realistic than the same percentage on a $5,000 project ($750). The fund should scale with the project's complexity and size.
- Clarify Payment Schedules: Understand the payment structure before signing a contract. Most contractors require a deposit, followed by progress payments at key milestones (e.g., post-demolition, after plumbing rough-in). Never pay the full amount upfront.
By establishing a solid budget and financing plan first, you empower yourself to make informed, confident decisions throughout the renovation process. For more specific strategies on stretching your dollars, explore our guide on creating a budget-friendly kitchen remodel.
2. Hire a Licensed, Insured Contractor with References
Once your budget is set, your next critical decision is choosing the right professional to bring your vision to life. Selecting a qualified contractor is the single most important factor in the success of your project. A licensed, bonded, and insured professional like Garner Construction & Maintenance provides not just expertise but also crucial protection for your investment, your property, and everyone involved. This step is non-negotiable in any serious home renovation checklist, as it safeguards you from shoddy workmanship, financial loss, and legal liability.
Vetting Your Potential Partners
The vetting process is a methodical investigation into a contractor's legitimacy and track record. Start by compiling a shortlist of candidates through referrals, industry associations like the National Association of the Remodeling Industry (NARI), or trusted online platforms. The goal is to verify credentials, assess quality of work, and gauge professionalism before signing any agreements.
This process protects you from hiring unqualified individuals who may lack the skill to execute your project or the financial stability to see it through. A property manager, for instance, must select an insured contractor to minimize liability on a rental property should an accident occur on-site.
Practical Vetting Tips
- Verify Credentials Independently: Always check a contractor's license number directly with your state's licensing board. Do not rely solely on the number they provide. Similarly, request a certificate of insurance and call the insurance company to confirm that their general liability and workers' compensation policies are active.
- Conduct Thorough Reference Checks: Contact at least three recent references. Ask specific questions about their experience, focusing on communication, budget adherence, timeline management, and how the contractor handled unexpected challenges.
- Insist on a Detailed Written Contract: A professional contract outlines the full scope of work, material specifications, a payment schedule, the project timeline, and warranty information. Never proceed on a verbal agreement, and ensure all promises are documented.
Hiring the right team is foundational to a smooth renovation. To ensure you cover all your bases, review our detailed guide on the essential questions to ask a general contractor before making your final decision.
3. Obtain Necessary Permits and Ensure Code Compliance
Navigating building permits can seem like a bureaucratic hurdle, but it is a non-negotiable step in a responsible home renovation checklist. Permits are your official authorization to proceed with a project, ensuring the work is performed safely and meets local building codes, zoning laws, and construction standards. This critical process protects your family’s safety, your home’s structural integrity, and your investment. It also prevents legal and financial complications, such as fines, stop-work orders, or difficulties when selling your property in the future.
Understanding the Permitting Process
The first step is determining if your project requires a permit. Most substantial work does, including structural alterations, additions, and significant changes to electrical, plumbing, or HVAC systems. Your local municipal building department is the definitive source for this information.
Experienced contractors are invaluable here; they understand the specific requirements of local jurisdictions and can manage the entire application and inspection process on your behalf. This includes submitting detailed plans, scheduling mandatory inspections at key project phases, and securing the final certificate of occupancy or completion once all work has been approved.
Practical Permitting Tips
- Clarify Permit Responsibility: Your contract should explicitly state who is responsible for obtaining all necessary permits. A reputable firm like Garner Construction & Maintenance will typically handle this as part of their service.
- Factor Permits into Your Timeline: The permit approval process can take weeks or even months. Account for this administrative lead time in your project schedule to avoid frustrating delays before construction can even begin.
- Keep Meticulous Records: Retain copies of all permit applications, approved permits, and inspection reports. These documents are crucial for your records and will be essential if you ever sell your home.
By treating permits as a fundamental project milestone rather than an afterthought, you ensure your renovation is not only beautiful but also safe, legal, and built to last. For a deeper look at project requirements, our guide to a budget-friendly kitchen remodel touches on planning phases where permits are considered.
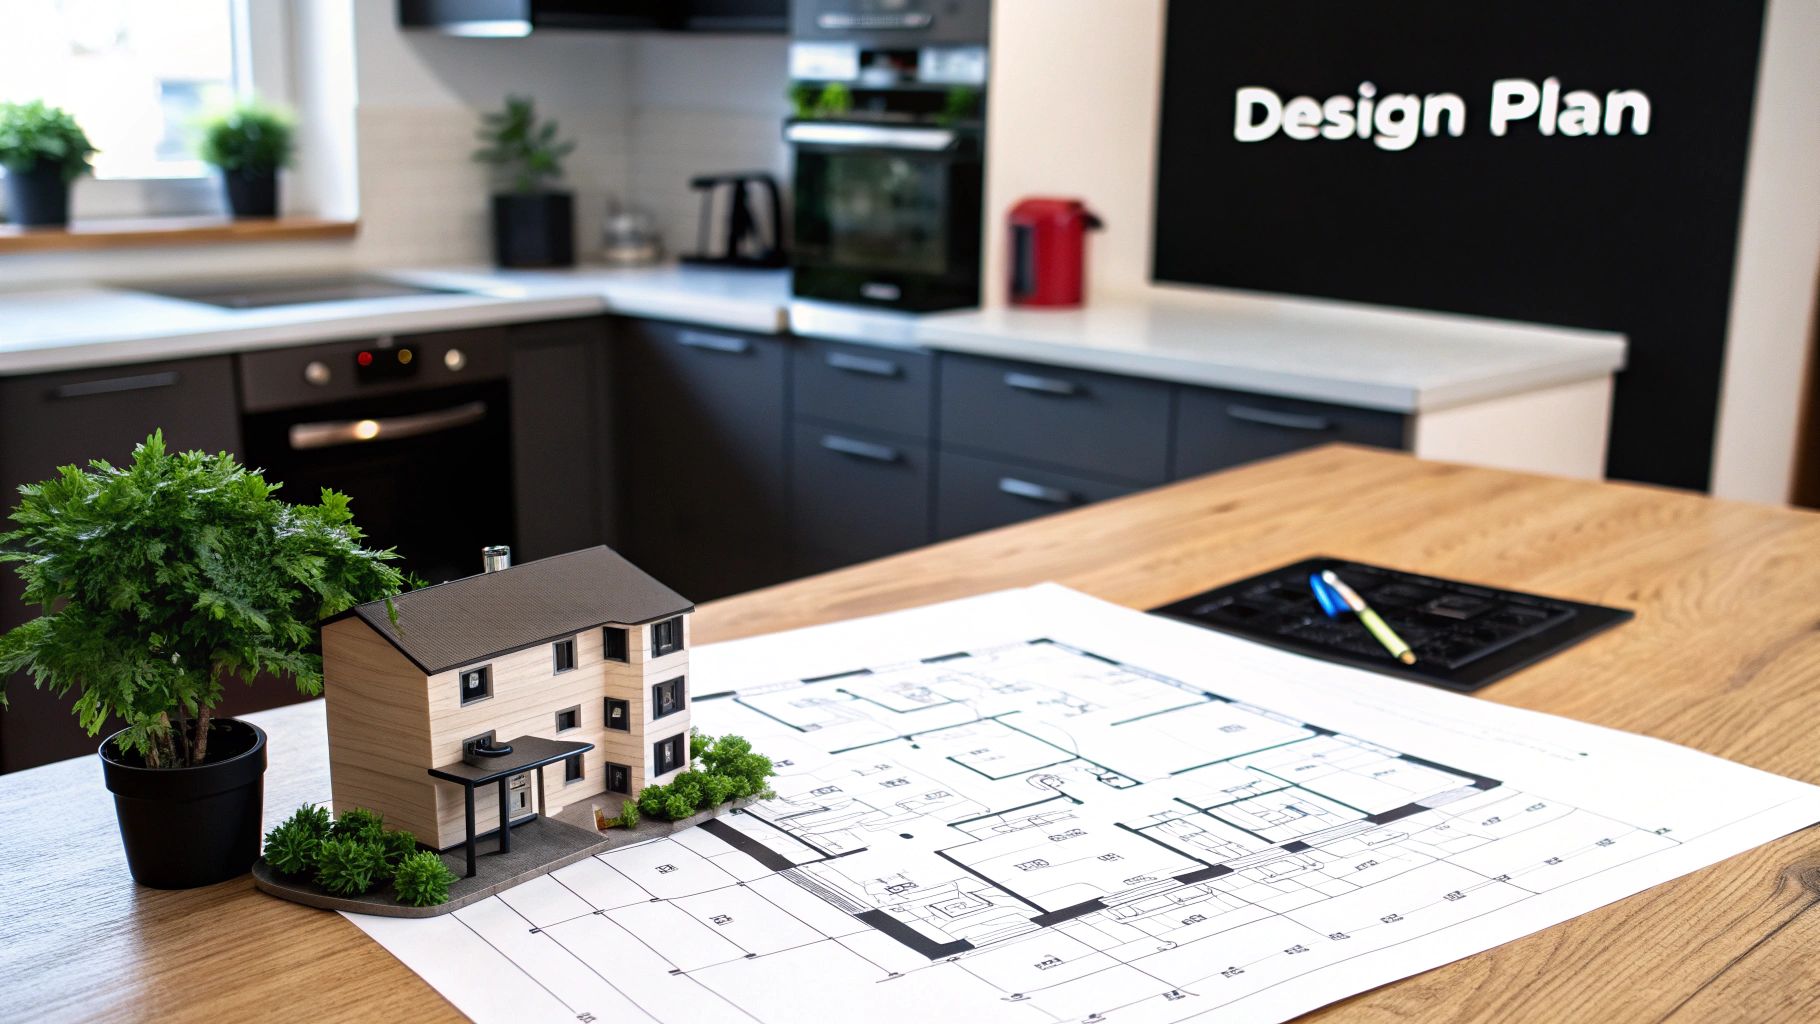
4. Plan Layout and Design Before Construction Begins
Finalizing your layout and design is a non-negotiable step in a home renovation checklist before any demolition takes place. This phase translates your vision into a tangible plan, dictating everything from where walls will stand to where outlets will be placed. A detailed design blueprint prevents costly and time-consuming mid-project changes, which can derail both your budget and your timeline. It ensures that functional needs, like workflow in a kitchen or accessibility in a bathroom, are met while achieving your desired aesthetic.
Developing Your Design Blueprint
Begin by creating a detailed floor plan. Use digital tools like SketchUp or RoomSketcher, or simply graph paper, to map out the space. This is where you decide on major changes, such as removing a wall to create an open-concept kitchen or reconfiguring a bathroom layout to add a walk-in shower. For example, a homeowner might use this phase to discover that shifting a doorway by six inches dramatically improves the room's flow and furniture placement options.
This is also the time to finalize all material and fixture selections. From cabinetry finishes and countertop materials to tile patterns and lighting fixtures, every choice impacts the final look and budget. The NKBA (National Kitchen & Bath Association) provides excellent design standards that can guide decisions on clearances and functional layouts.
Practical Design Planning Tips
- Source Materials Early: Order long-lead-time items like custom cabinets, windows, or specialty tile well in advance. Supply chain delays can halt an entire project, so having these items on-site before they are needed is critical.
- Create a Visual Mood Board: Use platforms like Pinterest or Houzz to collect images that reflect your style. A visual guide is the most effective way to communicate your aesthetic preferences to your contractor, ensuring everyone is aligned.
- Think About Function and Flow: Walk through the planned space mentally. In a kitchen, consider the "work triangle" between the sink, stove, and refrigerator. In a bathroom, ensure there's adequate clearance around the toilet and vanity.
- Get Written Design Approval: Before construction starts, make sure you and your contractor, such as Garner Construction & Maintenance, sign off on the final, detailed design plans. This document becomes the official guide for the project and helps prevent misunderstandings later.
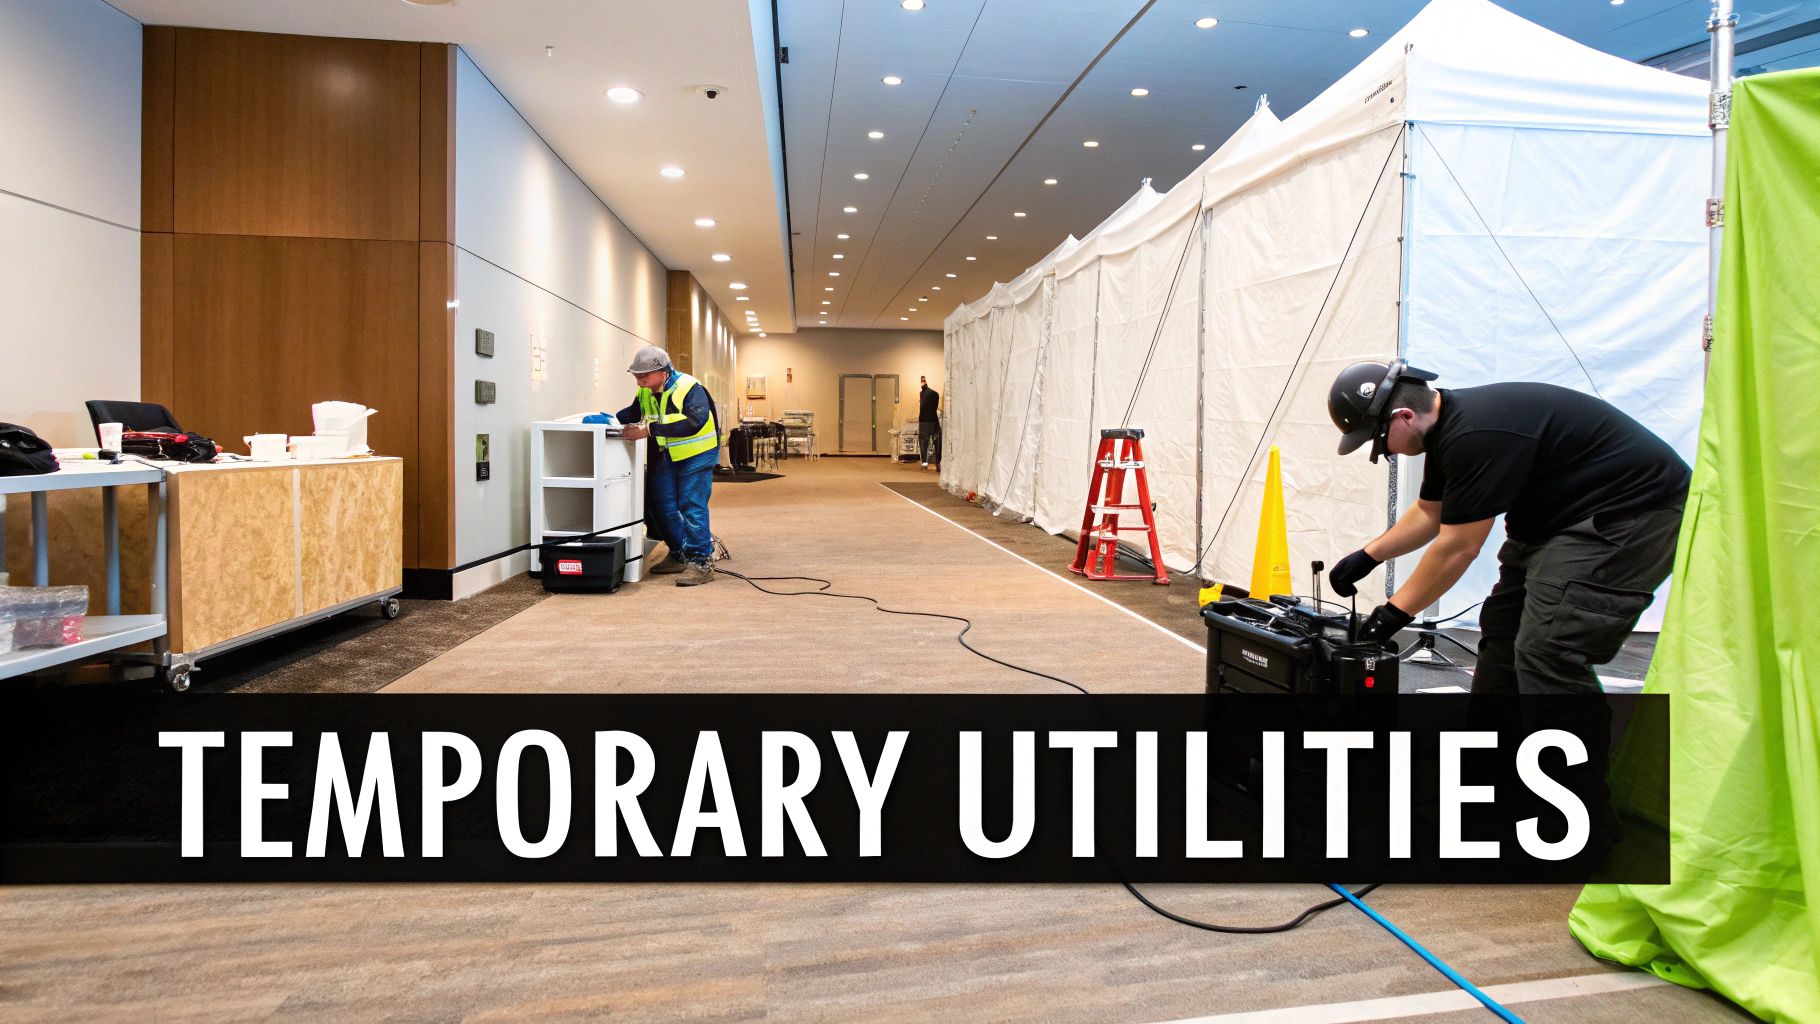
5. Prepare the Work Area and Establish Temporary Utilities
Proper site preparation is a critical, often overlooked step in a home renovation checklist that directly impacts the project's efficiency and your comfort. Before demolition begins, the work zone must be isolated to protect the rest of your home from dust and debris. This involves more than just laying down a drop cloth; it's a strategic process of containment and planning for temporary living arrangements, which minimizes disruption, safeguards your belongings, and creates a secure and efficient environment for contractors.
Creating a Livable Construction Zone
The first step is isolating the work area. This is typically done by sealing off doorways with heavy-duty plastic sheeting and zippers to create dust barriers. Protecting floors in adjacent rooms and high-traffic pathways is also essential. For kitchen or bathroom remodels, planning for life without these core utilities is crucial. This could mean setting up a temporary kitchenette with a microwave and coffee maker in the dining room or arranging for a portable toilet if the home's only bathroom is under construction.
A well-prepared site respects both your living space and the contractor's workflow. It prevents the fine layer of construction dust that seems to permeate everything and ensures the project team can work safely and without causing accidental damage to unaffected parts of your home.
Practical Site Preparation Tips
- Establish Clear Boundaries: Use painter's tape or signs to clearly mark which areas are off-limits to the construction crew. This includes designating specific entry and exit points.
- Plan for Utilities Early: Discuss temporary utility needs with your contractor, like Garner Construction & Maintenance, during the pre-construction meeting. Will you need temporary water, power, or a makeshift kitchen?
- Protect Your HVAC System: Construction dust can wreak havoc on your HVAC. Turn off the system in the work area if possible, seal vents, and plan to replace your system's air filter more frequently throughout the project.
- Schedule Daily Clean-Ups: Insist on an end-of-day clean-up clause in your contract. A tidy site is a safe site and prevents debris from accumulating and spreading.
By thoughtfully preparing your home before work begins, you set the stage for a smoother, cleaner, and less stressful renovation experience.
6. Conduct Thorough Inspections and Address Hidden Issues
The demolition phase is often the moment of truth in a renovation, where the home reveals secrets hidden behind walls and beneath floors. This step in your home renovation checklist is about proactively identifying and managing these unforeseen problems, which can range from outdated wiring and leaky pipes to structural damage or mold. Addressing these issues as they arise is crucial not only for the integrity and safety of your home but also for keeping the project on track and preventing much costlier repairs down the line.
Uncovering What Lies Beneath
Before demolition begins, it's wise to have a general idea of potential risks, especially in older homes. Experienced contractors can often predict common issues based on a home's age and location, but the full picture emerges only when surfaces are removed. For example, a kitchen remodel might uncover unsafe, non-compliant electrical wiring that necessitates a full panel upgrade. Similarly, a bathroom renovation could expose extensive mold growth behind the shower tiles, requiring professional remediation before any new work can proceed.
These discoveries are precisely why a contingency fund is a non-negotiable part of your budget. It provides the financial flexibility to address these critical findings without derailing your entire project.
Practical Tips for Managing Surprises
- Understand the Change Order Process: Before signing any contract, make sure you understand how your contractor, like Garner Construction & Maintenance, handles change orders. All unexpected work and associated costs should be documented and approved by you in writing before work continues.
- Prioritize Safety Above All: If the budget becomes strained by unexpected issues, prioritize problems that affect safety and structural integrity. This includes electrical, plumbing, foundation, and mold issues. Cosmetic upgrades can be postponed, but foundational safety cannot.
- Request Detailed Documentation: Ask your contractor to provide photo or video evidence of any hidden issues they discover. This documentation is essential for your own records and for understanding exactly what work is required before the areas are sealed up again.
By preparing for the unexpected, you can turn potential project-stopping disasters into manageable tasks, ensuring your renovation is built on a safe and solid foundation.
7. Select Quality Materials and Finishes Strategically
Choosing the right materials is where your design vision truly comes to life, balancing aesthetics, durability, and cost. This critical step in your home renovation checklist involves more than just picking a color; it's about investing strategically to ensure longevity and value. High-quality materials in high-impact areas often deliver a better return on investment, while understanding the different tiers of finishes allows you to optimize your budget without compromising the final result. This is a balancing act between initial cost and long-term performance.
Making Smart Material Investments
Your goal is to allocate your budget where it matters most. For instance, in a kitchen remodel, the countertop is a high-use surface that endures daily wear. Opting for a durable, non-porous material like quartz is a strategic investment against stains and scratches. Conversely, you might save by choosing semi-custom cabinetry that offers a high-end look without the full custom price tag. Similarly, in a bathroom, waterproof luxury vinyl plank (LVP) flooring provides the look of wood with superior durability in a moisture-prone environment.
Working with a knowledgeable contractor like Garner Construction & Maintenance is invaluable here, as they can guide you through the pros and cons of different materials based on your home's specific needs and your lifestyle.
Practical Selection Tips
- Prioritize High-Wear Areas: Invest the most in surfaces that see the most action. This includes kitchen countertops, flooring in main traffic paths, and bathroom tile. Durability in these spots prevents costly future replacements.
- Get Physical Samples: Never finalize a material based on a picture online. Obtain samples and view them in your home's actual lighting conditions at different times of day to see how colors and textures truly appear.
- Evaluate Long-Term Maintenance: Consider the upkeep. Natural stone like marble requires regular sealing, whereas engineered quartz is virtually maintenance-free. Understanding these long-term commitments is crucial for your satisfaction.
- Review Warranties: A manufacturer's warranty is a strong indicator of a product's quality and durability. Longer, more comprehensive warranties often signal a superior product that the company stands behind.
8. Manage Change Orders and Scope Creep Carefully
Even the most meticulously planned project can encounter surprises. Change orders, which are formal modifications to the original project scope, are a common part of any renovation. Whether an unexpected issue arises during demolition or you decide on a last-minute upgrade, how these changes are handled is critical. Unmanaged change orders are a primary cause of budget overruns and timeline delays, turning a controlled project into a chaotic and expensive endeavor. This is a vital step in any home renovation checklist because it establishes a protocol for navigating the inevitable unknowns.
Establishing a Formal Change Order Process
A change order is not a casual "while you're at it" request. It's a contractual amendment that should be documented in writing. This process protects both you and your contractor by ensuring everyone is clear on the adjustments to scope, cost, and schedule. For instance, if demolition for a kitchen remodel reveals outdated plumbing that must be rerouted to meet code, a formal change order would detail the new work required, its cost (e.g., $2,500), and any impact on the project timeline.
A professional contractor will manage this process systematically, presenting you with a clear, written document before proceeding. This transparency prevents misunderstandings and ensures that changes are deliberate decisions, not afterthoughts that appear on the final bill.
Practical Tips for Managing Scope
- Define the Protocol Upfront: Before construction begins, agree with your contractor on the exact process for handling changes. Stipulate that all change orders must be in writing and approved by you before work commences.
- Analyze the Impact: A proper change order, like those Garner Construction & Maintenance provides, clearly outlines the cost breakdown and schedule adjustments. This allows you to weigh the necessity of the change against its impact on your budget and completion date.
- Differentiate Needs from Wants: Categorize change orders as either necessary (e.g., fixing hidden structural rot) or discretionary (e.g., upgrading to heated floors). This helps prioritize spending and keeps your contingency fund reserved for true emergencies.
- Track Cumulatively: Keep a running total of all approved change orders. If the total starts approaching 10-15% of your original budget, it’s a signal to pause and re-evaluate any further discretionary changes.
By implementing a strict change order protocol, you maintain control over your project's finances and timeline, ensuring that every adjustment is a conscious choice, not a costly surprise.
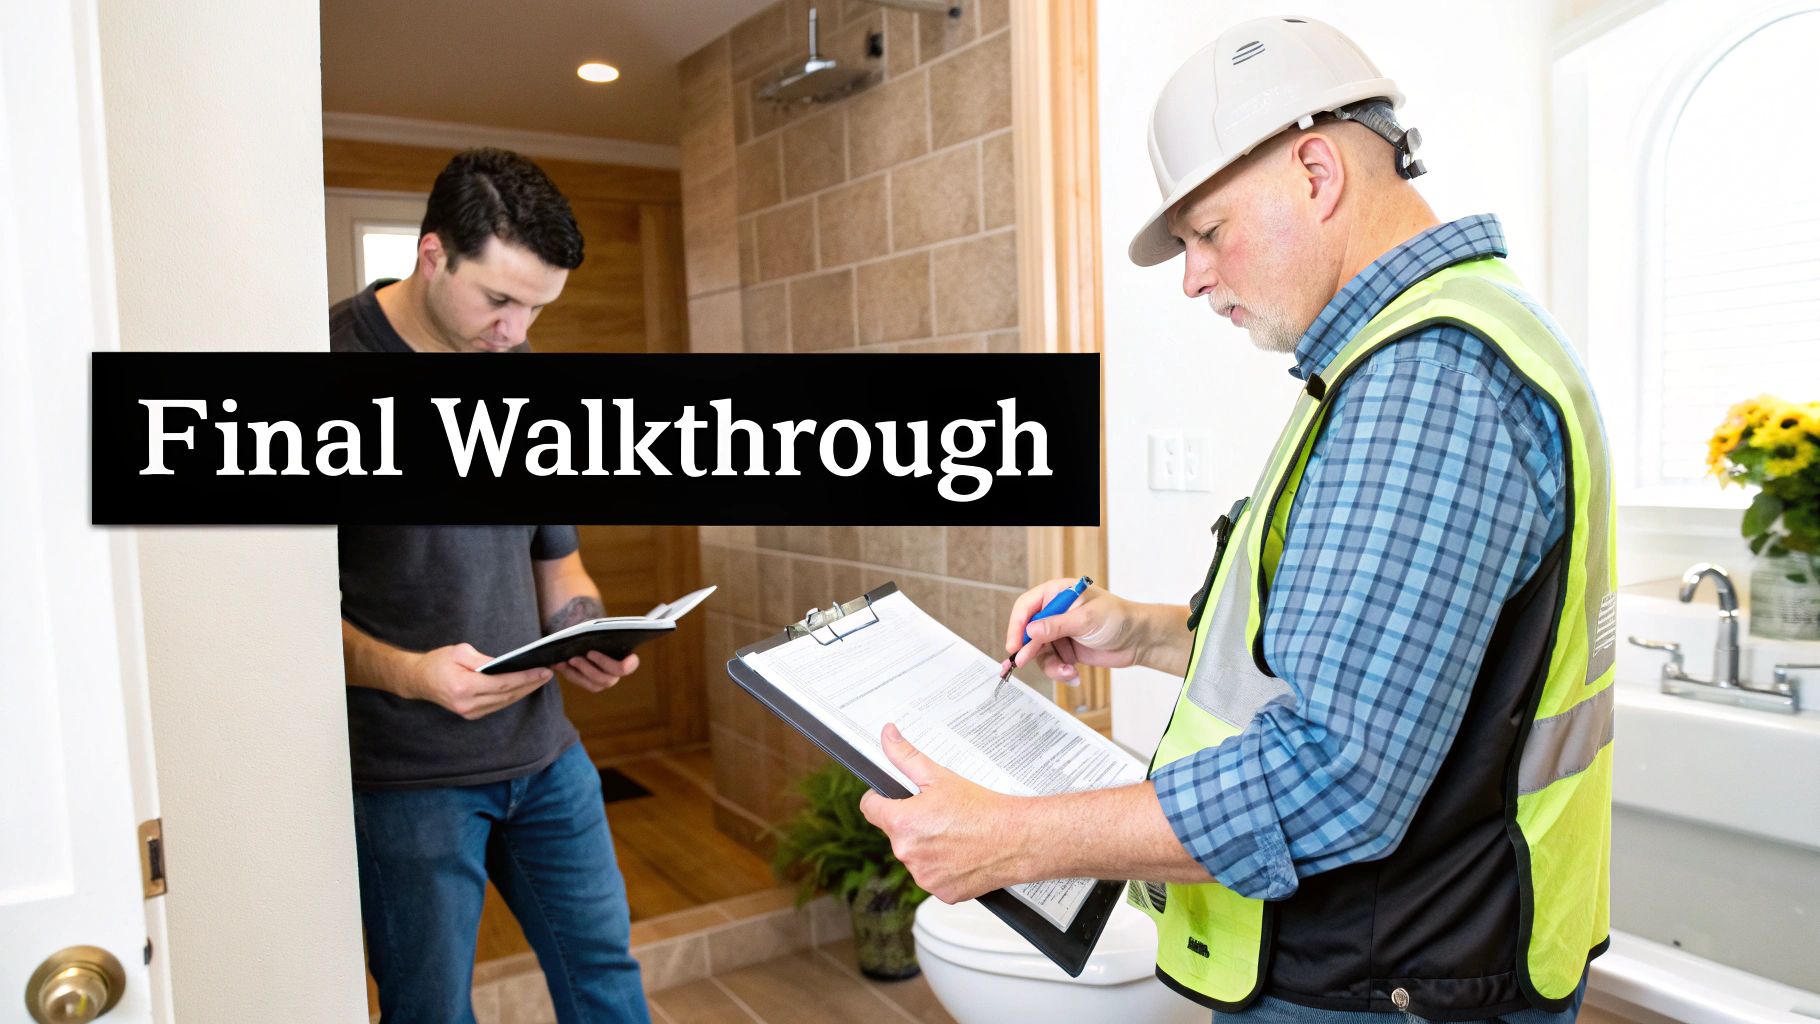
9. Maintain Clear Communication, Documentation, Cleanup and Final Walkthrough
A successful renovation project hinges on more than just quality materials and skilled labor; it relies on a foundation of clear, consistent communication and meticulous project closeout. This critical step in any home renovation checklist ensures that the homeowner’s vision aligns with the contractor's execution from start to finish. Establishing firm protocols for communication, documentation, site cleanliness, and a detailed final inspection prevents costly misunderstandings and guarantees the final product meets every expectation.
This process transforms the final phase from a potentially stressful handover into a collaborative and satisfying conclusion. A contractor who prioritizes transparency, systematic cleanup, and a thorough walkthrough demonstrates a commitment to client satisfaction and professional excellence.
Creating a System for Success
The project's end should be as organized as its beginning. Start by defining communication preferences with your contractor before work begins. Will updates be daily or weekly? Through email, text, or a project management app? This sets a clear expectation for information flow.
The final walkthrough is not a quick glance; it's a systematic inspection. Using your original contract and design plans as a guide, test every component of the renovation. This includes all electrical outlets, plumbing fixtures, appliances, and hardware. The goal is to identify any outstanding issues or incomplete items, creating a definitive "punch list" for the contractor to address before the final payment is released. A meticulous final review ensures the work is not just done, but done right.
Practical Communication and Closeout Tips
- Document Everything: Avoid verbal agreements. Confirm all changes, decisions, and approvals in writing (email or a change order) to create a clear record. This protects both you and the contractor.
- Schedule a Formal Walkthrough: Don't rush this crucial step. Set aside a dedicated time with your contractor, like Garner Construction & Maintenance, to review the project scope item by item. Use a checklist to ensure nothing is missed.
- Test All Systems: During the walkthrough, physically test everything. Run faucets at various temperatures, flush toilets, flip all light switches, test every outlet, and operate all new appliances to confirm they are functioning correctly.
- Withhold Final Payment: Do not release the final payment until all items on your punch list have been completed to your satisfaction and all debris has been removed from the site.
By insisting on clear communication and a detailed closeout process, you ensure your project concludes smoothly, meeting the high standards you envisioned. For a deeper look into ensuring project standards are met, review this construction quality control checklist.
10. Maximize Return on Investment (ROI) and Curb Appeal for Resale
If selling your property is on the horizon, every renovation decision should be viewed through the lens of market value. This crucial step in your home renovation checklist shifts the focus from purely personal preference to strategic improvements that attract buyers and maximize financial returns. A renovation geared for resale is about making smart, market-driven choices that enhance curb appeal and update key areas, ensuring your investment pays off when the "For Sale" sign goes up. It requires a clear understanding of what local buyers want and which projects deliver the highest ROI.
Making Strategic Upgrade Choices
Begin by researching your local real estate market. An experienced contractor or real estate agent can provide invaluable insights into which renovations resonate with buyers in your neighborhood. As a general rule, kitchen and bathroom remodels consistently deliver strong returns, often recouping 60-70% of their cost. Similarly, exterior improvements like a fresh coat of paint, new siding, or professional landscaping can yield an ROI of 80% or more, as they create a powerful and lasting first impression.
A key principle is to avoid over-improving for your area. Installing a high-end, professional-grade kitchen in a neighborhood of modest homes is unlikely to return its full value. The goal is to elevate your home to be one of the best in its class, not to price it out of the market.
Practical ROI-Focused Tips
- Prioritize Curb Appeal: The first thing a potential buyer sees is the exterior. Focus on projects like a new front door, updated light fixtures, fresh paint, and clean landscaping to create an inviting welcome.
- Stick to Neutral Palettes: When selecting finishes, opt for neutral and widely appealing colors like whites, grays, and beiges. These palettes allow potential buyers to more easily envision themselves and their belongings in the space.
- Focus on Kitchens and Bathrooms: These rooms are major selling points. A minor kitchen remodel (new countertops, refaced cabinets, updated hardware) or a mid-range bathroom update often provides a better ROI than a complete, high-end overhaul.
- Document Everything: Keep detailed records, receipts, and photos of all improvements. This documentation provides tangible proof of value to appraisers and potential buyers, justifying your asking price.
By approaching your renovation with resale in mind, you transform it from a simple expense into a strategic investment. For expert advice on pre-sale renovations that catch a buyer's eye, connect with a team like Garner Construction & Maintenance to guide your project.
10-Point Home Renovation Checklist Comparison
| Item | 🔄 Complexity | ⚡ Resources | ⭐ Expected outcomes | 📊 Ideal use cases | 💡 Key tips |
|---|---|---|---|---|---|
| Establish a Clear Budget and Financing Plan | Moderate — research, quotes, contingency planning | Low–Medium — time, quotes, contingency funds | ⭐⭐⭐⭐ — prevents overruns; clarifies priorities | Any renovation; initial planning; limited budgets | 💡 Get itemized quotes; set 10–20% contingency |
| Hire a Licensed, Insured Contractor with References | Moderate — vetting, verification, contract review | Medium — time to vet, potentially higher contractor cost | ⭐⭐⭐⭐⭐ — legal protection; professional quality | All projects, especially structural or code work | 💡 Verify license/insurance; check 3+ references; written contract |
| Obtain Necessary Permits and Ensure Code Compliance | Medium–High — jurisdictional processes, inspections | Medium — permit fees, paperwork, inspection scheduling | ⭐⭐⭐⭐⭐ — code-compliant, resale and insurance protection | Structural, electrical, plumbing, additions | 💡 Confirm permits early; keep records; plan 1–4 week lead |
| Plan Layout and Design Before Construction Begins | Moderate — design iterations, approvals, mockups | Medium — designer fees, time, renderings, samples | ⭐⭐⭐⭐ — reduces change orders; improves function/aesthetics | Kitchen/bath remodels; reconfigurations | 💡 Finalize layouts/fixtures in writing; source long-lead items |
| Prepare the Work Area and Establish Temporary Utilities | Low–Moderate — site prep, containment, logistics | Low–Medium — dust barriers, temporary facilities, labor | ⭐⭐⭐ — minimizes disruption; safer worksite | Major interior renovations; multi-room projects | 💡 Install dust barriers pre-demolition; plan temp facilities |
| Conduct Thorough Inspections and Address Hidden Issues | High — testing, specialist remediation, change orders | Medium–High — inspector/specialist fees, remediation costs | ⭐⭐⭐⭐⭐ — addresses safety; prevents larger future costs | Older homes; demolition/open-wall phases | 💡 Budget specific contingency; require photo documentation |
| Select Quality Materials and Finishes Strategically | Moderate — research, comparisons, sample review | Medium–High — material costs, lead times for specialty items | ⭐⭐⭐⭐ — durability, better ROI, improved aesthetics | High-traffic/moisture areas; resale-focused upgrades | 💡 Invest in high-wear zones; request samples; check warranties |
| Manage Change Orders and Scope Creep Carefully | Moderate — documentation and approval workflow | Low–Medium — admin time, potential extra costs | ⭐⭐⭐⭐ — controls costs and timeline, creates audit trail | Projects with discovery risk or evolving owner decisions | 💡 Require written change orders; set approval thresholds |
| Maintain Clear Communication, Documentation, Cleanup and Final Walkthrough | Moderate — ongoing coordination, documentation, cleanup | Low–Medium — time for meetings, cleanup services, PM access | ⭐⭐⭐⭐⭐ — reduces disputes; ensures contract compliance | All renovations, especially multi-contractor projects | 💡 Establish communication protocol; schedule final walkthrough; withhold final payment until satisfied |
| Maximize Return on Investment (ROI) and Curb Appeal for Resale | Moderate — market research, targeted upgrade selection | Medium — strategic upgrades, landscaping, quality finishes | ⭐⭐⭐⭐ — increased sale price and buyer interest | Pre-sale renovations; staging; neighborhood-aligned updates | 💡 Prioritize curb appeal & kitchens/baths; choose neutral finishes; time completion before listing |
Bringing It All Together for a Seamless Renovation
Embarking on a home renovation is a significant undertaking, blending the excitement of a new vision with the practicalities of construction and project management. This comprehensive home renovation checklist has guided you through every critical stage, transforming what can be an overwhelming process into a structured, manageable, and ultimately rewarding journey. From the foundational steps of establishing a clear budget to the final details of a punch-list walkthrough, you are now equipped with the knowledge to navigate your project with precision and confidence.
The journey from concept to completion is rarely a straight line. However, the principles outlined in this guide act as your project’s North Star, ensuring you remain on course even when unexpected challenges arise. Think of this checklist not just as a series of tasks to be completed, but as a strategic framework for success.
Your Blueprint for a Successful Outcome
Let's distill the most critical takeaways from our deep dive into the renovation process. These are the non-negotiable pillars that support a successful project from start to finish:
- Proactive Planning is Paramount: The vast majority of renovation stress stems from poor planning. Your initial work in defining your goals, setting a realistic budget, and securing financing is the single most important investment you can make. Rushing this phase almost guarantees costly changes and delays down the line.
- Your Contractor is Your Partner: The relationship you build with your contractor is foundational. This is why vetting professionals for licenses, insurance, and stellar references is not just a suggestion; it's a requirement. A great contractor brings expertise, transparency, and problem-solving skills to the table, turning your vision into a high-quality reality.
- Documentation is Your Safety Net: From the initial contract and scope of work to every change order and communication, meticulous documentation protects all parties. It eliminates ambiguity, provides a clear record of decisions, and ensures that everyone is aligned on expectations, costs, and timelines.
Key Insight: A successful renovation is less about avoiding problems entirely and more about having a robust system in place to solve them efficiently when they do occur. Clear communication and detailed documentation are the core components of that system.
From Checklist to Completed Project
With this guide, you have moved beyond generic advice. You now understand the importance of pulling permits to ensure safety and code compliance, the strategic value of planning layouts before a single wall comes down, and the financial wisdom of carefully managing scope creep through a formal change order process. You are prepared to select materials that balance aesthetics with durability and to conduct a final walkthrough that ensures every detail meets your standards.
Mastering this home renovation checklist empowers you to be an active, informed participant in your project rather than a passive bystander. For homeowners, this means achieving a space that truly reflects your lifestyle and enhances your daily life. For property managers and real estate agents, it means executing efficient, high-ROI projects that attract tenants or buyers and maximize property value. The principles of preparation, diligence, and clear communication are universal keys to unlocking a smooth and successful renovation experience, resulting in a beautifully transformed space you can be proud of for years to come.
Ready to turn your plans into a professionally executed reality? The principles in this guide are the foundation of our work at Garner Construction & Maintenance. We provide the transparent processes, skilled craftsmanship, and dedicated project management needed to bring your vision to life, ensuring every step aligns with your goals. Visit Garner Construction & Maintenance to see how our expertise can make your next renovation seamless and successful.